Sept. 28, 2024
Knitting Power and Paper Mache Trials
Listen
Read
21 - 27 September
The week started with me hurting my back. Not exactly sure how it happened, I just woke up one morning with so much pain that I could barely move or walk around. Sleeping was the worst as the bed is too soft and feels like it puts my spine out of alignment. One night I actually tried to sleep on the floor, which was good for my back, but very uncomfortable otherwise. My theory is the hand planing I was doing in woodworking, combined with a renewed effort into running. Two new activities that my body isn't used to. Anyway, that basically stalled most of my wood working this week.
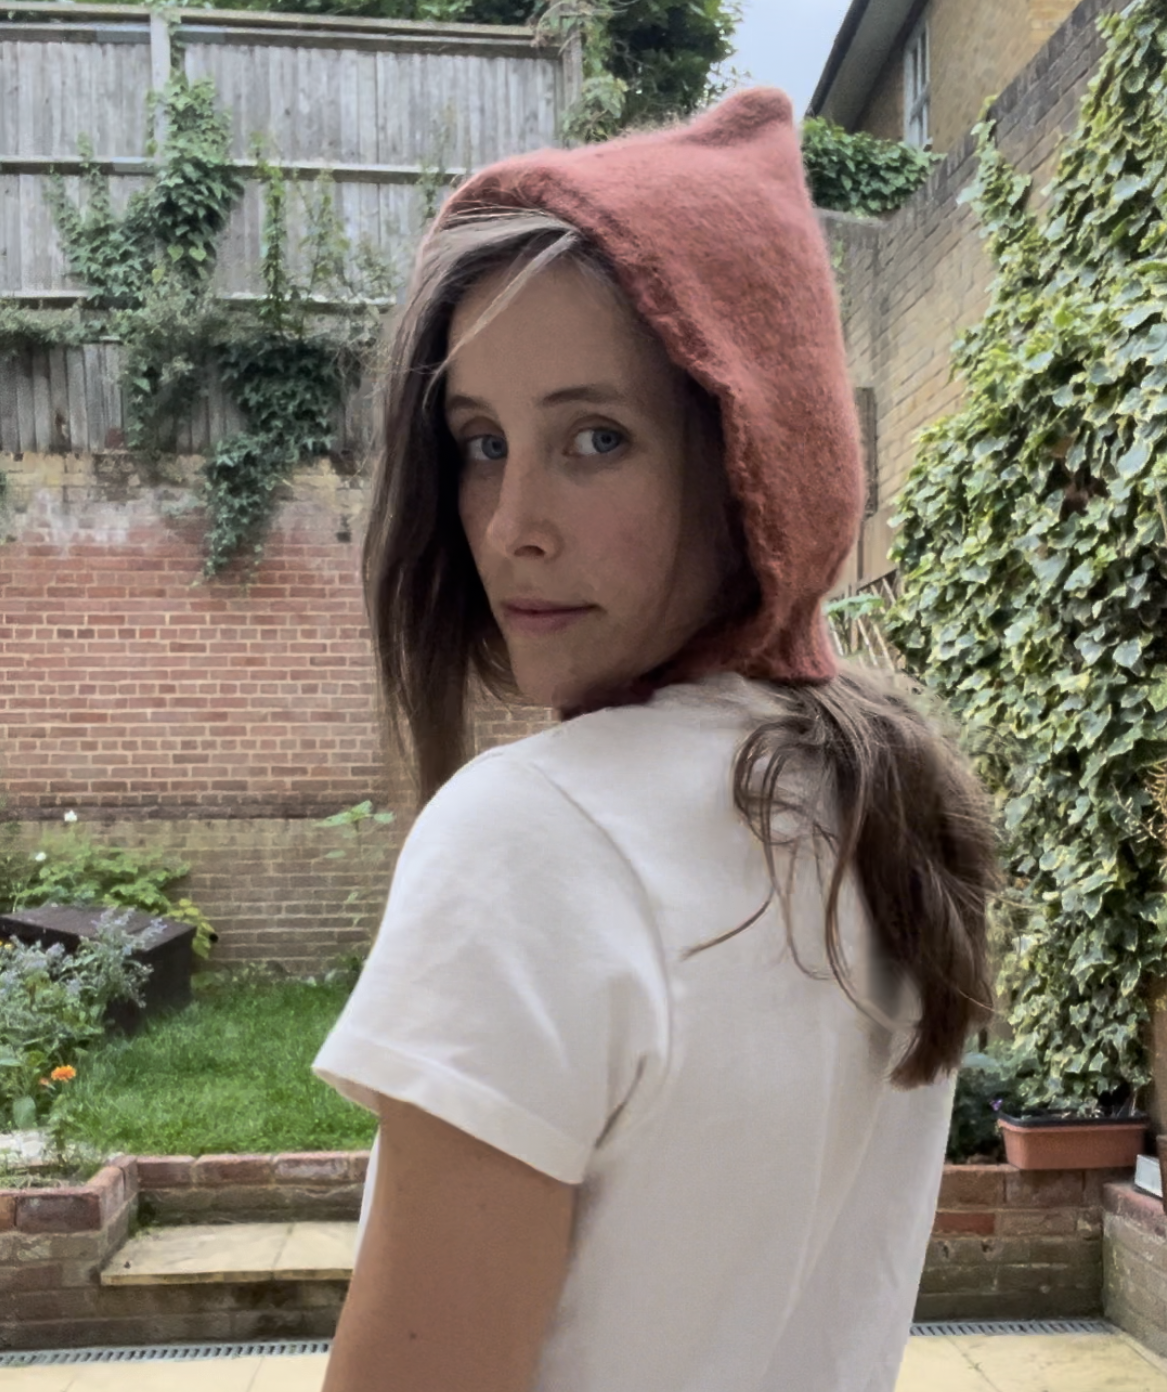
Instead I focused on knitting. I really went for it with the Rikke sweater and managed to finish it on Friday! My goodness. I feel like that took an age. This is the kind of jumper that could take months. Its just so slow to knit, even though i think i’m pretty fast. I managed to get it blocked and dried to wear for Sunday family lunch. LOVING it. It’s seamless, perfect size, warm, not very itchy - I could even wear it over a t-shirt. Overall very happy with it, loving the design, and I’ll be posting a dedicated project post about it soon.


finished rikke sweater
I then went straight onto the next knitting project, the Scotty Sweater; a much simpler style, with some embroidered geometric detailing at the end. I’m keen to do straight stockinette stitching for a change. The interesting feature with this one is I’m holding a strand of wool and a strand kid silk yarn together, so two strand at a time. So far the fabric is thinner that I anticipated though; it’s not going to be a thick sweater. The pattern says hold one wool and two kid silk strands, I’m doing just one kid silk. This is mainly because the woman in the shop said multiple kid silks or mohairs would get extremely thick, so I decided just to holdone. However, the wool yarn itself is already pretty thin, so basically it’s ending up not being very thick. This isn’t necessarily a bad thing… in fact I’d probably like some thinner knitted jumpers, as bulky jumpers are much more common. So far so good, early stages.
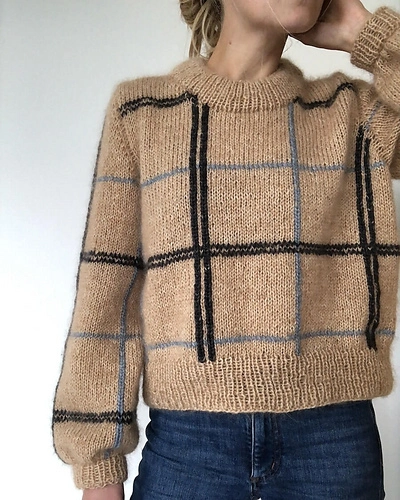

Scotty sweater image from pattern, my progress
Over the week I put the finishing touches on the ghost costume, I drew on a ghost face on the front and back, and added some dangling sleeves. I’m pretty sure the client (child) is happy with it overall and will call that costume done. For the unicorn, I made a unicorn horn with paper mache the week before I believe, with an elastic to secure around the head. It went down pretty well with the client, though the horn is a bit heavy and requires some balancing on the head. It was mentioned that adding unicorn ears would be nice, but I couldn’t quite conceptualise how to do it. This was until I watched a few videos from this woman’s channel called ultimatepapermache.com. She’s epic in paper mache. That inspired me to maybe try make a kind of unicorn hat mask with horns and ears. So I went about making it.

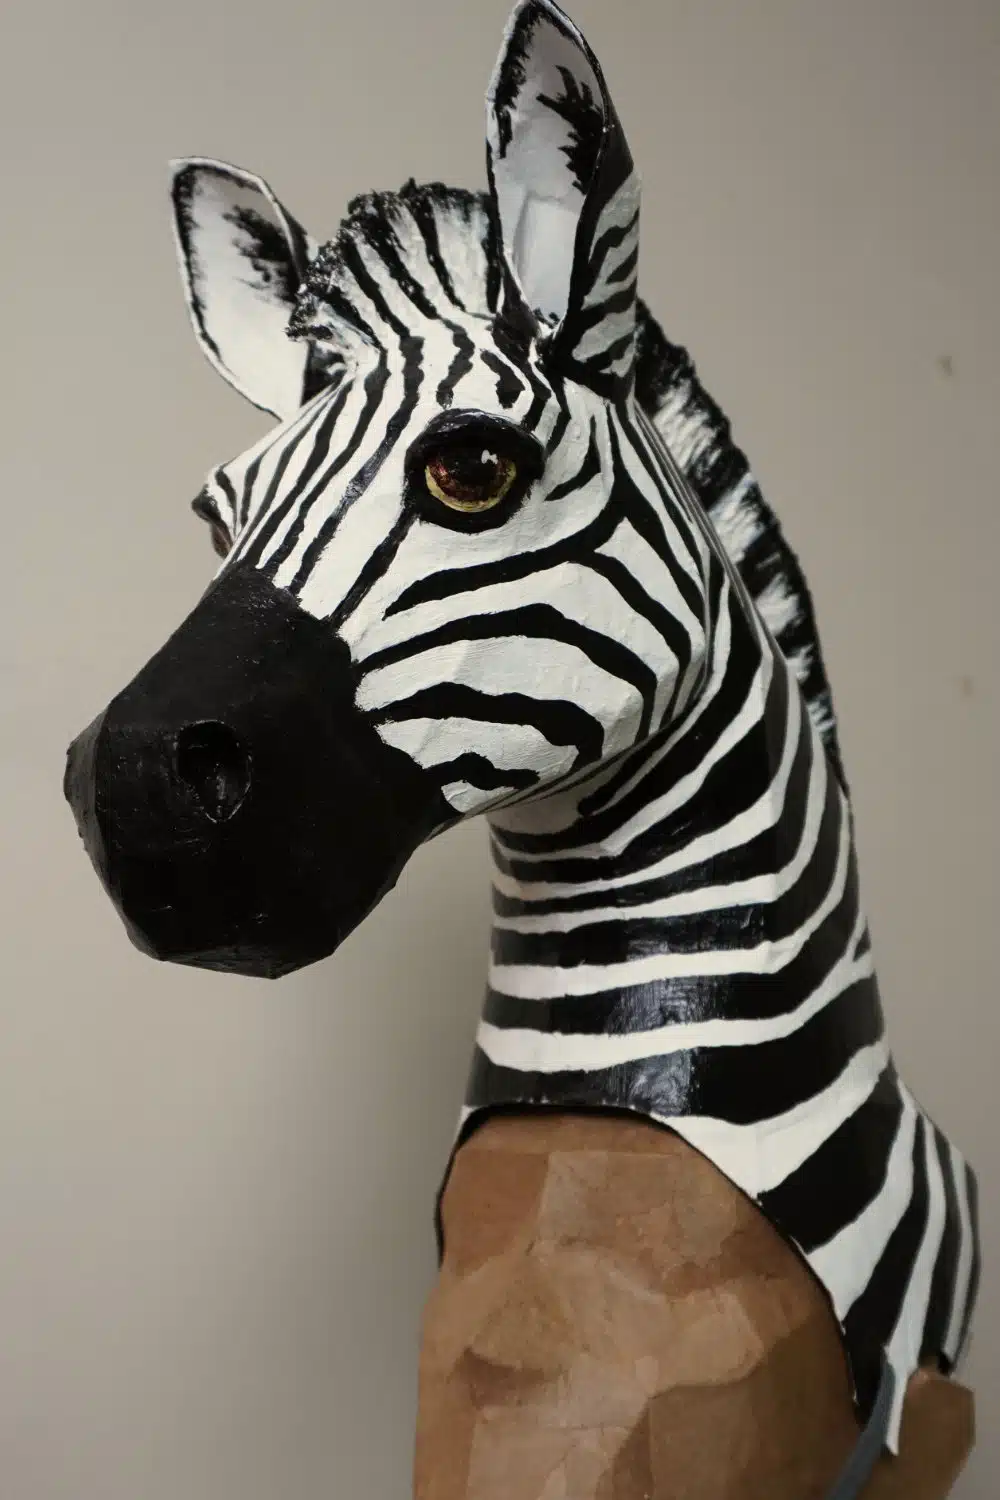
Finished Ghost Costume from back, INSPO zebra mask from ultimate paper mache
It was a multi step process, in ensuring each layer of mache was dried before starting another one. Then a good coating of glue on the outer layer before painting. I did a white head, gold horn, and rainbow mane. It’s not finished yet, it needs to dry and have some final details added. I’d say it’s a decent first attempt. I made the main 3d form quite roughly with cereal box cardboard and used paper strips to mache it over it. From the ultimate paper mache channel, I saw that she used paper pulp a lot, where you used it more like a moulding clay to get much more precise shapes and features. If you use strips, then you are just covering the surface of the existing shape that you made the 3d form out of, which may have rough edges and undesirable shapes - which is what I did. This lady’s paper mache clay recipe includes some kind of builders jointing compound etc, I didn’t want to mess around with that just yet.
The long short - I just used paper strips, the classic method, so the form is still rough in shape, i.e. not a smooth edged. It’s a decent starter project, more of an experimentation with mache to see if it’s a good medium to make stuff. I think the way the lady does it is amazing. If you cut out a perfect 3d paper template, then you can use strips to just solidify that shape and you are good to go. On the other hand if you create a rough armature shape, then you should use paper clay to sculpt the shape you want over the top.


Anyways, enough said on this. In conclusion, will finish off this hat piece, I’ll give it a 5/10 but concept is proven. Undecided whether it will replace the first horn yet. In the future, I’ll definitely do more paper mache, perhaps use the clay method, or find 3d paper patterns to cut and stick to a perfect form. I love the idea and really happy I found this. It will be a great complement to fabric costume making.
In the second half of the week my back started getting better (although then started catching a cold from my partner who has been sick all week). I was able to do some light wood working. I realised that I had made my dovetail templates wrong! Classic. You’re supposed to have the mirrored angle on each side of the template, I had the same angle. When you go to draw out the angles with the guide, you get the same direction on each side of the wood. Basically no good. Will have to remake them. I’m not super mad though. I think next time I’ll do it with solid wood and carve out the pieces, instead of gluing plywood layers like I did the first time. It’s all good practice and learnings.
In spite of that, I did make some dove tail guides, i.e. saw-cut guides. I haven’t used these yet. My next mini project will be a practice dove tail box. Do all four corners of a box to get good at it. I think it’s probably a good idea, given my error rate, to do that before attempting the tool cupboard ones. Hopefully will get started on it next week.

dovetail guide - saw cuts
As I’m planing and sawing, there is so much sawdust and shavings that get created. Right now I’m throwing it all in the bin, but at some point I’d like to do something useful with them. I saw a video where they mixed sawdust with waste ground coffee (collected from coffee shops). You mix it and leave it for days or months, can’t remember, and then compress it into briquette moulds to make these blocks that you can then burn in your fireplace, so use as fuel. The guy used it in combination with actual logs though, not exclusively these briquettes. Anyway, this may be a good use for shaving waste. With the exception being that the plywood I’m using probably contains a lot of glues and chemicals in it, which might not be the best candidate to burn. For solid woods, should be fine.
Finally, for my latest feature on the blog, I’m planning to add voice overs of these posts. For people who want to listen to a narration of the post instead of reading it. Personally, I mostly consume audio based content i.e. podcasts and YouTube videos. While creating that kind of content is not where I am at, I could simply narrate these posts without too much extra organisation or editing. So that should be coming soon. Also, I haven’t checked yet, but hopefully my domain name should now be transferrable, so that will be another project to work on next week.
Total Likes: 0
Comments
No comments yet.

Charlotte Leysen
Hi there I'm Charlotte from London and I am a Millennial hobbiest. By that I mean I love making things, for both the process and the outcomes. On this blog I talk about all the things I'm working on and learning each week. On some projects I will go into a bit more detail on what I did and my experience through it.
Some facts about me:
- I am not a perfectionist, preferring to complete something than to attempt to make something flawless.
- I am in a constant cycle of building up inspiration, executing the ideas, then winding down to reflect and regenerate.
- I am interested in almost anything that can be made from scratch using nature / natural materials.